How to Plant Bulbs in the Green: A Step-by-Step Guide
The cold, grey days of January can make it hard to picture your garden bursting with colour and life. But trust us, those vibrant spring blooms are closer than you think! Even among the recent snowfall, the first brave bulbs are already poking their heads through the soil, ready to welcome the new season with open petals.
If you missed planting bulbs in the autumn, don’t worry, it’s not too late to add some spring cheer to your garden or wildflower meadow. One of the best ways to achieve an early garden glow is to plant bulbs in the green. This means simply planting bulbs while they’re actively growing, rather than in the autumn when they’re dormant. It’s an easy way to extend the blooming period of your garden and help those early pollinators find some much-needed food when they’re just waking up.
Here are our top tips and techniques for planting bulbs in the green to fill your garden and meadow with early spring colour. 🌷
What Does "Planting in the Green" Actually Mean?
So, "planting in the green” simply refers to planting bulbs that are already sprouting, usually when they’re in their early growth stages—for instance when planting snowdrop bulbs or bluebell bulbs in the green they will already show some leaves or even buds. You’re essentially planting these bulbs while they’re alive and active, instead of waiting for them to go dormant.
Planting bulbs in the green is a great option because bulbs planted this way tend to establish better in their new home and will often bloom the following season. Plus, it’s much easier to plant them when you can see where they’re growing!

When to Plant Your Bulbs in the Green
Ideally, you should plant your bulbs in the green as soon as you receive them. Early spring is perfect, but you can get away with planting them until mid-spring—just make sure the ground isn’t frozen or waterlogged. The sooner you get them in, the better chance they have to settle in and start their growing process.
If you’ve bought native wildflower bulb species like English bluebells (Hyacinthoides non-scripta), snowdrops (Galanthus nivalis), or wild daffodils (Narcissus pseudonarcissus), they’ll be much happier in your garden if they’re planted as soon as they arrive. These plants are well adapted to our soil and climate, so you’re giving them the best chance to thrive by getting them into the ground as soon as possible.
How Deep to Plant Bulbs in the Green
When it comes to planting depth, here’s the rule of thumb: plant your bulbs at the same depth as they were in the pot or where they were growing prior to being lifted. For most native British species, this is usually about 8 to 10 cm deep. If you’re not sure, a quick glance at the bulb itself, and any emerging stalks and leaves, should give you a clue—look for the level at which the leaves change from white to green.
For larger bulbs like wild daffodils, you might want to plant them a little deeper, while small bulbs like snowdrops will be happier planted closer to the surface. The following is a rough guide to how deep to plant individual species of native British bulbs in the green:
Winter aconite: plant corms 5cm deep
Wood anemone: plant rhizomes 7-8cm deep horizontally
English bluebell: 10cm
Wild daffodil / Tenby daffodil: 10 – 15cm
Wild garlic: 5cm
Lily of the valley: Plant roots 5-7cm
Summer snowflake: 10cm
Nodding star of Bethlehem: 7cm
Single and double snowdrop: 5-10cm
Wild tulip: 10-15cm

Spacing Your Bulbs: Give Them Room to Grow
When planting bulbs in the green, it's crucial to give each bulb enough space to grow and spread. For most native species, a good rule of thumb is to plant them about 10 to 15 cm apart. This allows them enough room to develop without overcrowding each other. If you want a more natural look, you can space them a bit further apart, but don’t worry too much about perfection—the beauty of naturalised bulbs is that they often spread and fill in over time, creating a lovely, relaxed and natural effect.
Tools You’ll Need for Planting Bulbs in the Green
You don’t need an extensive toolbox to plant bulbs in the green, but there are a couple of handy tools that will make your life a lot easier.
- A Bulb Dibber: A bulb dibber is a fantastic tool designed specifically for planting bulbs. It's basically a pointed stick, with a comfortable handle, that you push into the soil to create a hole, making it easier to plant bulbs at the right depth. Dibbers are perfect for small to medium-sized bulbs like snowdrops or crocuses. They're also incredibly easy to use: simply push the dibber into the soil to the required depth, then drop your bulb in, and cover it up. The main advantage of a bulb dibber is its precision—it helps you make neat, uniform holes, so your bulbs are planted at the right depth and spacing every time.
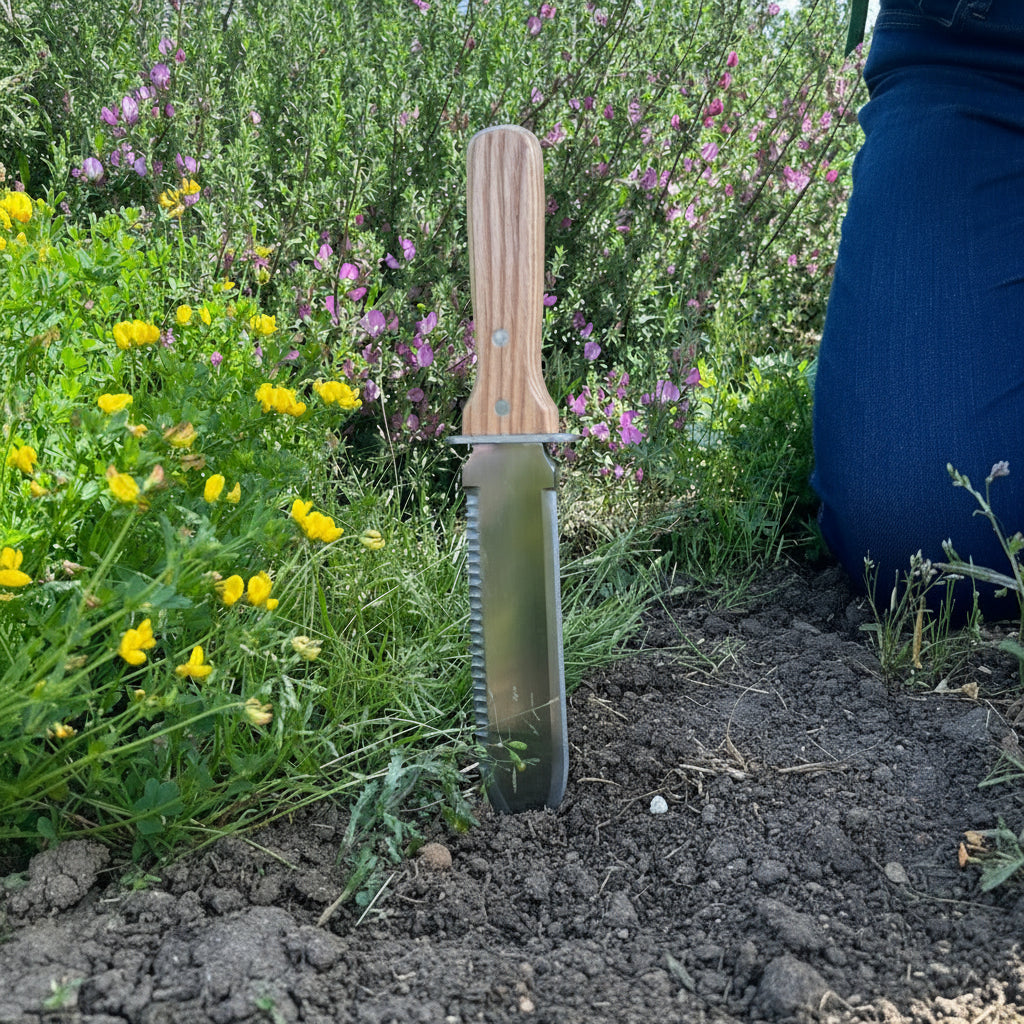
- A Hori Hori Knife: If you're dealing with tougher soil or larger bulbs, a hori hori knife might be a better option. This versatile Japanese tool features a pointed, serrated blade and is excellent for digging, cutting, and even weeding. It’s especially handy for larger bulbs like wild daffodils, or if you need to break through a bit of hard soil. The serrated edge can make cutting through tougher ground much easier, and the knife also gives you more flexibility than a bulb dibber when you're working with different types of bulbs.
How to Plant Your Bulbs in the Green: A Quick Step-by-Step Guide
- Prepare the soil: Prepare well before your bulbs in the green arrive. Remove perennial weeds and debris from the area to be planted and make sure the soil is loose and well-draining. You might want to lightly fork it through to break up any clumps, especially if it’s a bit compacted.
- Dig your holes: Use your dibber or hori hori knife to create holes that are the right depth for your bulbs. Leave plenty of room between the bulbs in the green for them to spread and form clumps in the following years.
- Place the bulbs in the hole: Gently position the bulbs with their roots facing down.
- Cover them up: Once your bulbs are in place, cover them with soil and gently press down to firm the soil around them.
- Water them in: Give your newly planted bulbs in the green a good watering to settle the soil around them and get them off to a strong start.
- And finally, mulch! If you’re planting in a particularly dry or exposed area, it’s worth adding a light layer of mulch to help retain moisture. This will also help protect the bulbs as they settle in, keeping the soil temperature more stable.
Dividing Bulbs in the Green in Spring
Every few years, if the clump of bulbs starts looking overcrowded, it’s a good idea to refresh it by dividing it up. The best time to do this is when the plants are actively growing in the spring. Loosen the soil around the clump and gently lift it out. Separate into smaller pieces, making sure each has roots and shoots and remove any damaged roots or leaves. After splitting them up, you can replant the new bulbs nearby to create an even bigger, more vibrant patch, or pop them in pots and share them with friends.
The plants will settle in quickly and start multiplying, which makes them perfect for naturalizing in places like lawns or under trees, where you want them to spread out and thrive.
There you have it: a simple, easy guide to planting bulbs in the green. Whether you're adding more snowdrops, planting some wild daffodils, or spreading bluebells throughout your garden, getting your bulbs in the green into the soil at the right time, at the right depth, and with the right tools is key to a stunning display.
Don't forget to check out our complete range of native UK bulbs in the green for even more planting options!
Happy planting, and here's to a beautiful, colourful spring!
🌷 🌷 🌷


